在Texts中,我们介绍了各个文本控件的用法和区别。在这篇文档中,我们将重点介绍各个支持富文本的控件和它的用法。
支持富文本的控件有:
- SRichTextBlock
- SMultiLineEditableText
- SMultiLineEditableTextBox
- SListView
SRichTextBlock
在下面的例子中,文本中尖括号内的内容,将会被解析为富文本使用的样式,``为当前样式的结束符,两者之间的内容我需要显示的文本。
例如下面的例子中,我们在一行文本中,同时使用了三个不同Style的文本样式:"Bold","TextHighlight","Credits.H2"来显示文本
"SRichTextBlock":
{
    "Text": "<RichTextBlock.Bold>Bold</>  <RichTextBlock.TextHighlight>Highlight</>  <Credits.H2>Unreal</>"
}

Default Style
在不指定"Marshaller"的情况下,SRichTextBlock默认使用的SlateStyle为FCoreStyle。在SlateEditorStyle.cpp中,我们可以找到RichTextBlock.Bold和RichTextBlock.TextHighlight的定义,如下所示:
Set("RichTextBlock.TextHighlight", FTextBlockStyle(NormalText)
    .SetColorAndOpacity(FLinearColor( 1.0f, 1.0f, 1.0f)));

Set("RichTextBlock.Bold", FTextBlockStyle(NormalText)
    .SetFont(DEFAULT_FONT("Bold", FCoreStyle::RegularTextSize)));

Set("Credits.H2", FTextBlockStyle(CreditsNormal)
    .SetColorAndOpacity(EditorOrange)
    .SetFont(DEFAULT_FONT("Bold", 30))
    .SetShadowOffset(FVector2D::UnitVector));
NOTE
在UE4中为FEditorStyle
ChameleonRichText
当指定"Marshaller"为: "ChameleonRichText"后,我们可以使用自定义的富文本样式,例如,我们可以使用<RichText.red>Red来定义红色的文本。
其他可用的颜色名,可以参考x11 color names
"SRichTextBlock": {
    "Text": "<RichText.red>Red</> <RichText.green>Green</> <RichText.cyan>Blue</><TextStyle FontFamily=\"Roboto\" FontSize=\"13\" FontStyle=\"Italic\" FontColor=\"(R=1, G=1,B=0,A=1)\"> Rich text</>",
    "Marshaller": "ChameleonRichText"
}

除了使用RichText.red这样的颜色名来指定颜色,我们还可以使用FontColor=\"(R=1,G=1,B=0,A=1)\"这样的颜色数值形式颜色
例如,下面的例子中,我们使用了FontColor=\"(R=0,G=1,B=0,A=0.5)\"来指定了一个半透明的绿色,同时也指定了字体的大小,字体的样式,并且还给文本添加了一个超链接,点击后会打开浏览器并跳转到指定的网页
"SRichTextBlock": {
    "Text": "<TextStyle FontFamily=\"Roboto\" FontSize=\"11\" FontStyle=\"Bold\" FontColor=\"(R=0,G=1,B=0,A=0.5)\">This is a hyperlink: </><a id=\"browser\" href=\"https:\/\/www.unrealengine.com/\" style=\"RichText.Editor.Hyperlink\">Unreal Engine</>",
    "Marshaller": "ChameleonRichText"
}

SMultiLineEditableTextBox
在SMultiLineEditableTextBox 中启用富文本,我们只需要在"Marshaller"中指定为"ChameleonRichText"即可。当前只支持ChameleonRichText。
"SMultiLineEditableTextBox": {
    "Text": "<TextStyle FontFamily=\"Roboto\" FontSize=\"15\" FontStyle=\"Regular\" FontColor=\"(R=0,G=1,B=0,A=1)\">This is a hyperlink</> <a id=\"browser\" href=\"tacolor.xyz\"> show</>\n<RichText.red>RichText</> <RichText.orange>In</> <RichText.yellow>SMultiLine</><RichText.green>EditableTextBox</>",
    "Marshaller": "ChameleonRichText",
    "HintText": "This is a SMultiLineEditableTextBox",
    "ToolTipText": "Read only",
    "Margin": 10,
    "IsReadOnly": false,
    "AutoWrapText": true,
    "OnTextChanged": "print(%)",
    "OnTextCommitted": "print('text: {}'.format(%))"
}
其他SMultiLineEditableText控件中启用富文本的方法和SMultiLineEditableTextBox类似,这里就不再赘述了。
SListView
在SListView中,要启用富文本,我们需要在其中添加一个名为"RichText"的字段,并将其设置为true,例如:

"SListView": {
    "ItemHeight": 10,
    "ListItemsSource": [
        "<a id=\"browser\" href=\"https:\/\/www.unrealengine.com/\" style=\"RichText.Editor.Hyperlink\">Unreal Engine</><TextStyle FontFamily=\"Roboto\" FontSize=\"13\" FontStyle=\"Regular\" FontColor=\"(R=1.000000,G=1.000000,B=0.000000,A=1.000000)\"></>",
        "<RichText.red>Red</> <RichText.green>Green</> <RichText.cyan>Blue</>",
        "<TextStyle FontFamily=\"Roboto\" FontSize=\"12\" FontStyle=\"Regular\" FontColor=\"(R=0,G=1,B=0,A=1)\">Green front size 12</>",
        "Normal Text"
    ],
    "SHeaderRow": {
        "Columns": [
            {
                "DefaultLabel": "SListView with RichText",
                "FillWidth": 1
            }
        ]
    },
    "RichText": true,
    "OnSelectionChanged": "print ('Selected: {}  index: {}'.format(%item, %index))",
    "OnMouseButtonDoubleClick": "print ('Double click: {}  index: {}'.format(%item, %index))"
}
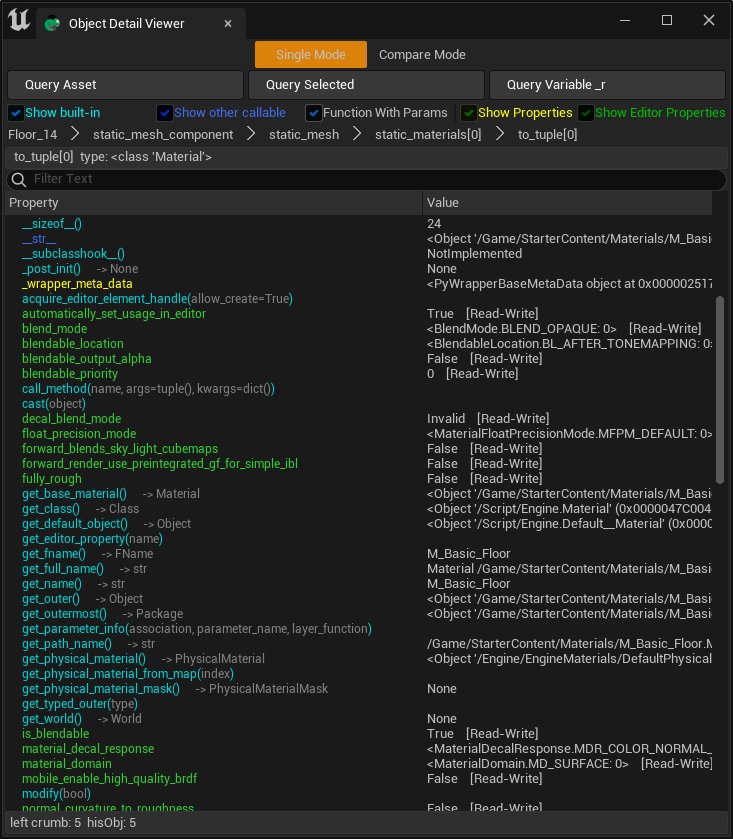
一个更为复杂的例子,是Built-in ToolsObject Detail Viewer。

SWebBrowser
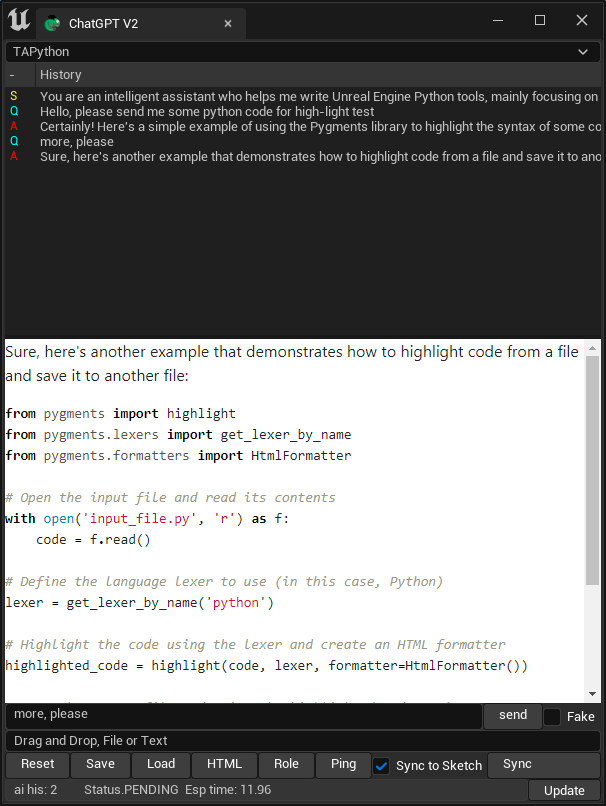
对于一下更复杂的显示需求,可以考虑一下SWebBrowser,使用它,我们可以在控件中嵌入网页内容。其中的内容可以来自互联网,本地服务器,或者来自即时生成的html的文本。例如,我们在UE中的ChatGPT工具中,就使用了实时生成的html内容。

使用SWebBrowser,用于显示Markdown文本,,配合高亮显示代码,是一个不错的选择。
例如,使用三方库:markdown和它的扩展插件markdown.extensions.fenced_code, markdown.extensions.codehilite,可以将Markdown文本转换为html文本,并且高亮显示代码。
content = Markup(markdown.markdown(ai_response, extensions=['fenced_code', 'codehilite']))
css
在SWebBrowser代码高亮需要使用对应的css样式,我们有两种方式可以选择:
- 在本地启动一个http服务器
此服务器随着Chameleon Tool工具的开启而启动。它的的职责是提供css文件供SWebBrowser中以指定url获取css文件。
例如:下面的例子中,我们在本地通过socketserver启动了一个http服务器
with socketserver.TCPServer(("", PORT), Handler) as httpd:
    while not self._stop:
        httpd.handle_request()
- 将css文件的内容内嵌到html中,例如下面的代码中,我们直接将css文件的内容内嵌到了
<style>标签中。
def combine_css_with_html(self, html_text: str) -> str:
    css_files = [
                "css/style.css",
                "css/pygments/github.css",
                    ]
    result = """<!DOCTYPE html>
                <html lang="en">
                <head><meta charset="UTF-8"><title>Answer</title>\n"""
    for css_file in css_files:
        file_path = os.path.join(os.path.dirname(__file__), css_file)
        with open(file_path, 'r', encoding="utf-8") as f:
            result += "<style>"
            result += f.read() + ""
            result += "</style>"
    result += "        </head>\n"

    result += "        <body>\n"
    result += html_text
    result += "</body></html>"
    return result
TIP
第二种作法在实际中相应速度更快,也更加方便。