In Textswe introduced the usage and differences of various text widgets. In this document, we will focus on introducing various rich text-supported widgets and their usage.
Rich text-supported widgets include:
- SRichTextBlock
- SMultiLineEditableText
- SMultiLineEditableTextBox
- SListView
SRichTextBlock
In the example below, the content within angle brackets in the text will be parsed as the style used for rich text, is the end symbol for the current style, and the content between them is the text to be displayed.
For example, in the example below, we used three different text styles in a single line of text: "Bold", "TextHighlight", and "Credits.H2" to display the text.
"SRichTextBlock":
{
    "Text": "<RichTextBlock.Bold>Bold</>  <RichTextBlock.TextHighlight>Highlight</>  <Credits.H2>Unreal</>"
}

Default Style
Without specifying a "Marshaller", the default SlateStyle used by SRichTextBlock is FCoreStyle. In SlateEditorStyle.cpp, we can find the definitions of RichTextBlock.Bold and RichTextBlock.TextHighlight, as shown below:
Set("RichTextBlock.TextHighlight", FTextBlockStyle(NormalText)
    .SetColorAndOpacity(FLinearColor( 1.0f, 1.0f, 1.0f)));

Set("RichTextBlock.Bold", FTextBlockStyle(NormalText)
    .SetFont(DEFAULT_FONT("Bold", FCoreStyle::RegularTextSize)));

Set("Credits.H2", FTextBlockStyle(CreditsNormal)
    .SetColorAndOpacity(EditorOrange)
    .SetFont(DEFAULT_FONT("Bold", 30))
    .SetShadowOffset(FVector2D::UnitVector));
NOTE
In UE4, it is FEditorStyle.
ChameleonRichText
When specifying "Marshaller" as "ChameleonRichText", we can use custom rich text styles, such as using
"SRichTextBlock": {
    "Text": "<RichText.red>Red</> <RichText.green>Green</> <RichText.cyan>Blue</><TextStyle FontFamily=\"Roboto\" FontSize=\"13\" FontStyle=\"Italic\" FontColor=\"(R=1, G=1,B=0,A=1)\"> Rich text</>",
    "Marshaller": "ChameleonRichText"
}

In addition to using color names like RichText.red to specify colors, we can also use color values like FontColor=\"(R=1,G=1,B=0,A=1)\".
For example, in the example below, we used FontColor=\"(R=0,G=1,B=0,A=0.5)\" to specify a semi-transparent green color, and also specified the font size, font style, and added a hyperlink to the text, which, when clicked, will open the browser and jump to the specified webpage.
"SRichTextBlock": {
    "Text": "<TextStyle FontFamily=\"Roboto\" FontSize=\"11\" FontStyle=\"Bold\" FontColor=\"(R=0,G=1,B=0,A=0.5)\">This is a hyperlink: </><a id=\"browser\" href=\"https:\/\/www.unrealengine.com/\" style=\"RichText.Editor.Hyperlink\">Unreal Engine</>",
    "Marshaller": "ChameleonRichText"
}

SMultiLineEditableTextBox
To enable rich text in SMultiLineEditableTextBox, we only need to specify "ChameleonRichText" in "Marshaller". Currently, only ChameleonRichText is supported.
"SMultiLineEditableTextBox": {
    "Text": "<TextStyle FontFamily=\"Roboto\" FontSize=\"15\" FontStyle=\"Regular\" FontColor=\"(R=0,G=1,B=0,A=1)\">This is a hyperlink</> <a id=\"browser\" href=\"tacolor.xyz\"> show</>\n<RichText.red>RichText</> <RichText.orange>In</> <RichText.yellow>SMultiLine</><RichText.green>EditableTextBox</>",
    "Marshaller": "ChameleonRichText",
    "HintText": "This is a SMultiLineEditableTextBox",
    "ToolTipText": "Read only",
    "Margin": 10,
    "IsReadOnly": false,
    "AutoWrapText": true,
    "OnTextChanged": "print(%)",
    "OnTextCommitted": "print('text: {}'.format(%))"
}
The method to enable rich text in other SMultiLineEditableText widgets is similar to that in SMultiLineEditableTextBox, so it will not be repeated here.
SListView
To enable rich text in SListView, we need to add a field called "RichText" and set it to true, as shown below:

"SListView": {
    "ItemHeight": 10,
    "ListItemsSource": [
        "<a id=\"browser\" href=\"https:\/\/www.unrealengine.com/\" style=\"RichText.Editor.Hyperlink\">Unreal Engine</><TextStyle FontFamily=\"Roboto\" FontSize=\"13\" FontStyle=\"Regular\" FontColor=\"(R=1.000000,G=1.000000,B=0.000000,A=1.000000)\"></>",
        "<RichText.red>Red</> <RichText.green>Green</> <RichText.cyan>Blue</>",
        "<TextStyle FontFamily=\"Roboto\" FontSize=\"12\" FontStyle=\"Regular\" FontColor=\"(R=0,G=1,B=0,A=1)\">Green front size 12</>",
        "Normal Text"
    ],
    "SHeaderRow": {
        "Columns": [
            {
                "DefaultLabel": "SListView with RichText",
                "FillWidth": 1
            }
        ]
    },
    "RichText": true,
    "OnSelectionChanged": "print ('Selected: {}  index: {}'.format(%item, %index))",
    "OnMouseButtonDoubleClick": "print ('Double click: {}  index: {}'.format(%item, %index))"
}
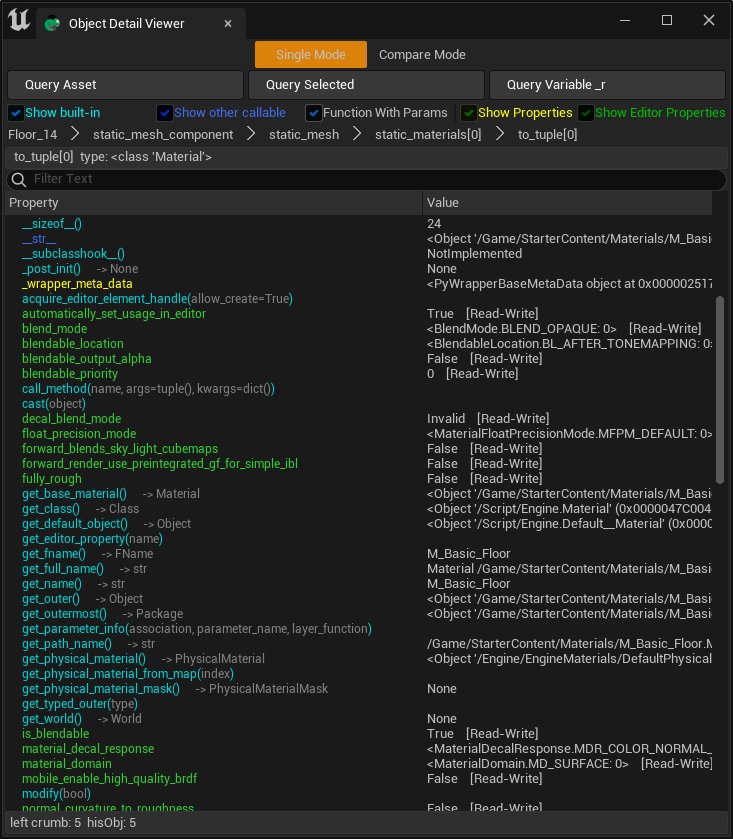
a more complex example is the Built-in ToolsObject Detail Viewer.

SWebBrowser
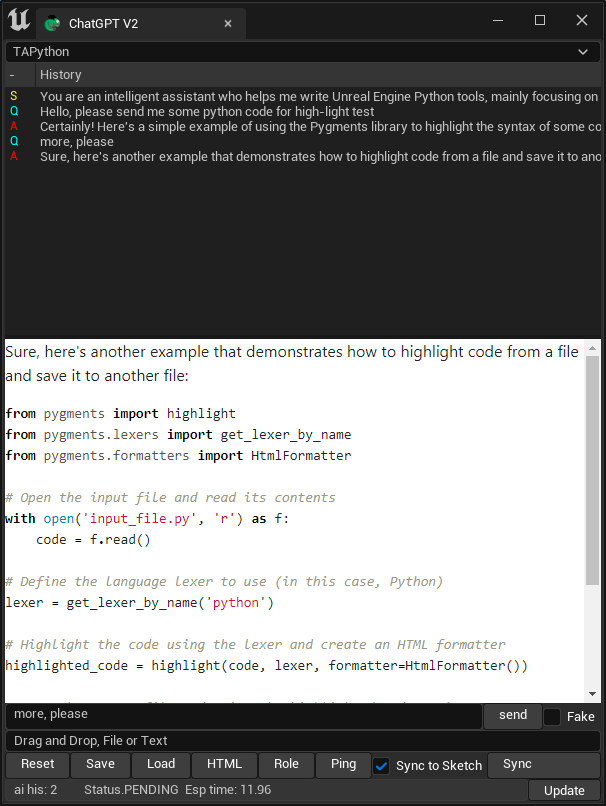
For more complex display requirements, consider using SWebBrowser, which allows us to embed web content within the widget. The content can come from the internet, a local server, or generated HTML text. For example, we used real-time generated HTML content in the ChatGPT tool in UE.

Using SWebBrowser to display Markdown text, combined with code highlighting, is a good choice.
For example, using third-party libraries: markdown and its extension plugins markdown.extensions.fenced_code, markdown.extensions.codehilite, you can convert Markdown text into HTML text and highlight code.
content = Markup(markdown.markdown(ai_response, extensions=['fenced_code', 'codehilite']))
css
Code highlighting in SWebBrowser requires corresponding CSS styles. We have two options to choose from:
- Start a local HTTP server
This server starts with the Chameleon Tool. Its responsibility is to provide CSS files for SWebBrowser to obtain CSS files with a specified URL.
For example, in the example below, we started a local HTTP server usingsocketserver
with socketserver.TCPServer(("", PORT), Handler) as httpd:
    while not self._stop:
        httpd.handle_request()
- Embed the contents of the CSS file into the HTML, as in the code below, where we directly embedded the contents of the CSS file into the
<style>tag.
def combine_css_with_html(self, html_text: str) -> str:
    css_files = [
                "css/style.css",
                "css/pygments/github.css",
                    ]
    result = """<!DOCTYPE html>
                <html lang="en">
                <head><meta charset="UTF-8"><title>Answer</title>\n"""
    for css_file in css_files:
        file_path = os.path.join(os.path.dirname(__file__), css_file)
        with open(file_path, 'r', encoding="utf-8") as f:
            result += "<style>"
            result += f.read() + ""
            result += "</style>"
    result += "        </head>\n"

    result += "        <body>\n"
    result += html_text
    result += "</body></html>"
    return result
TIP
The second method is faster in practice and more convenient.